Creating a pipeline
You can create a pipeline by using the GUI pipeline editor. This pipeline automates the notebook workflow that you used earlier to train a model and save it to S3 storage.
-
You configured a pipeline server as described in Enabling AI pipelines.
-
If you configured the pipeline server after you created your workbench, you stopped and then started your workbench.
-
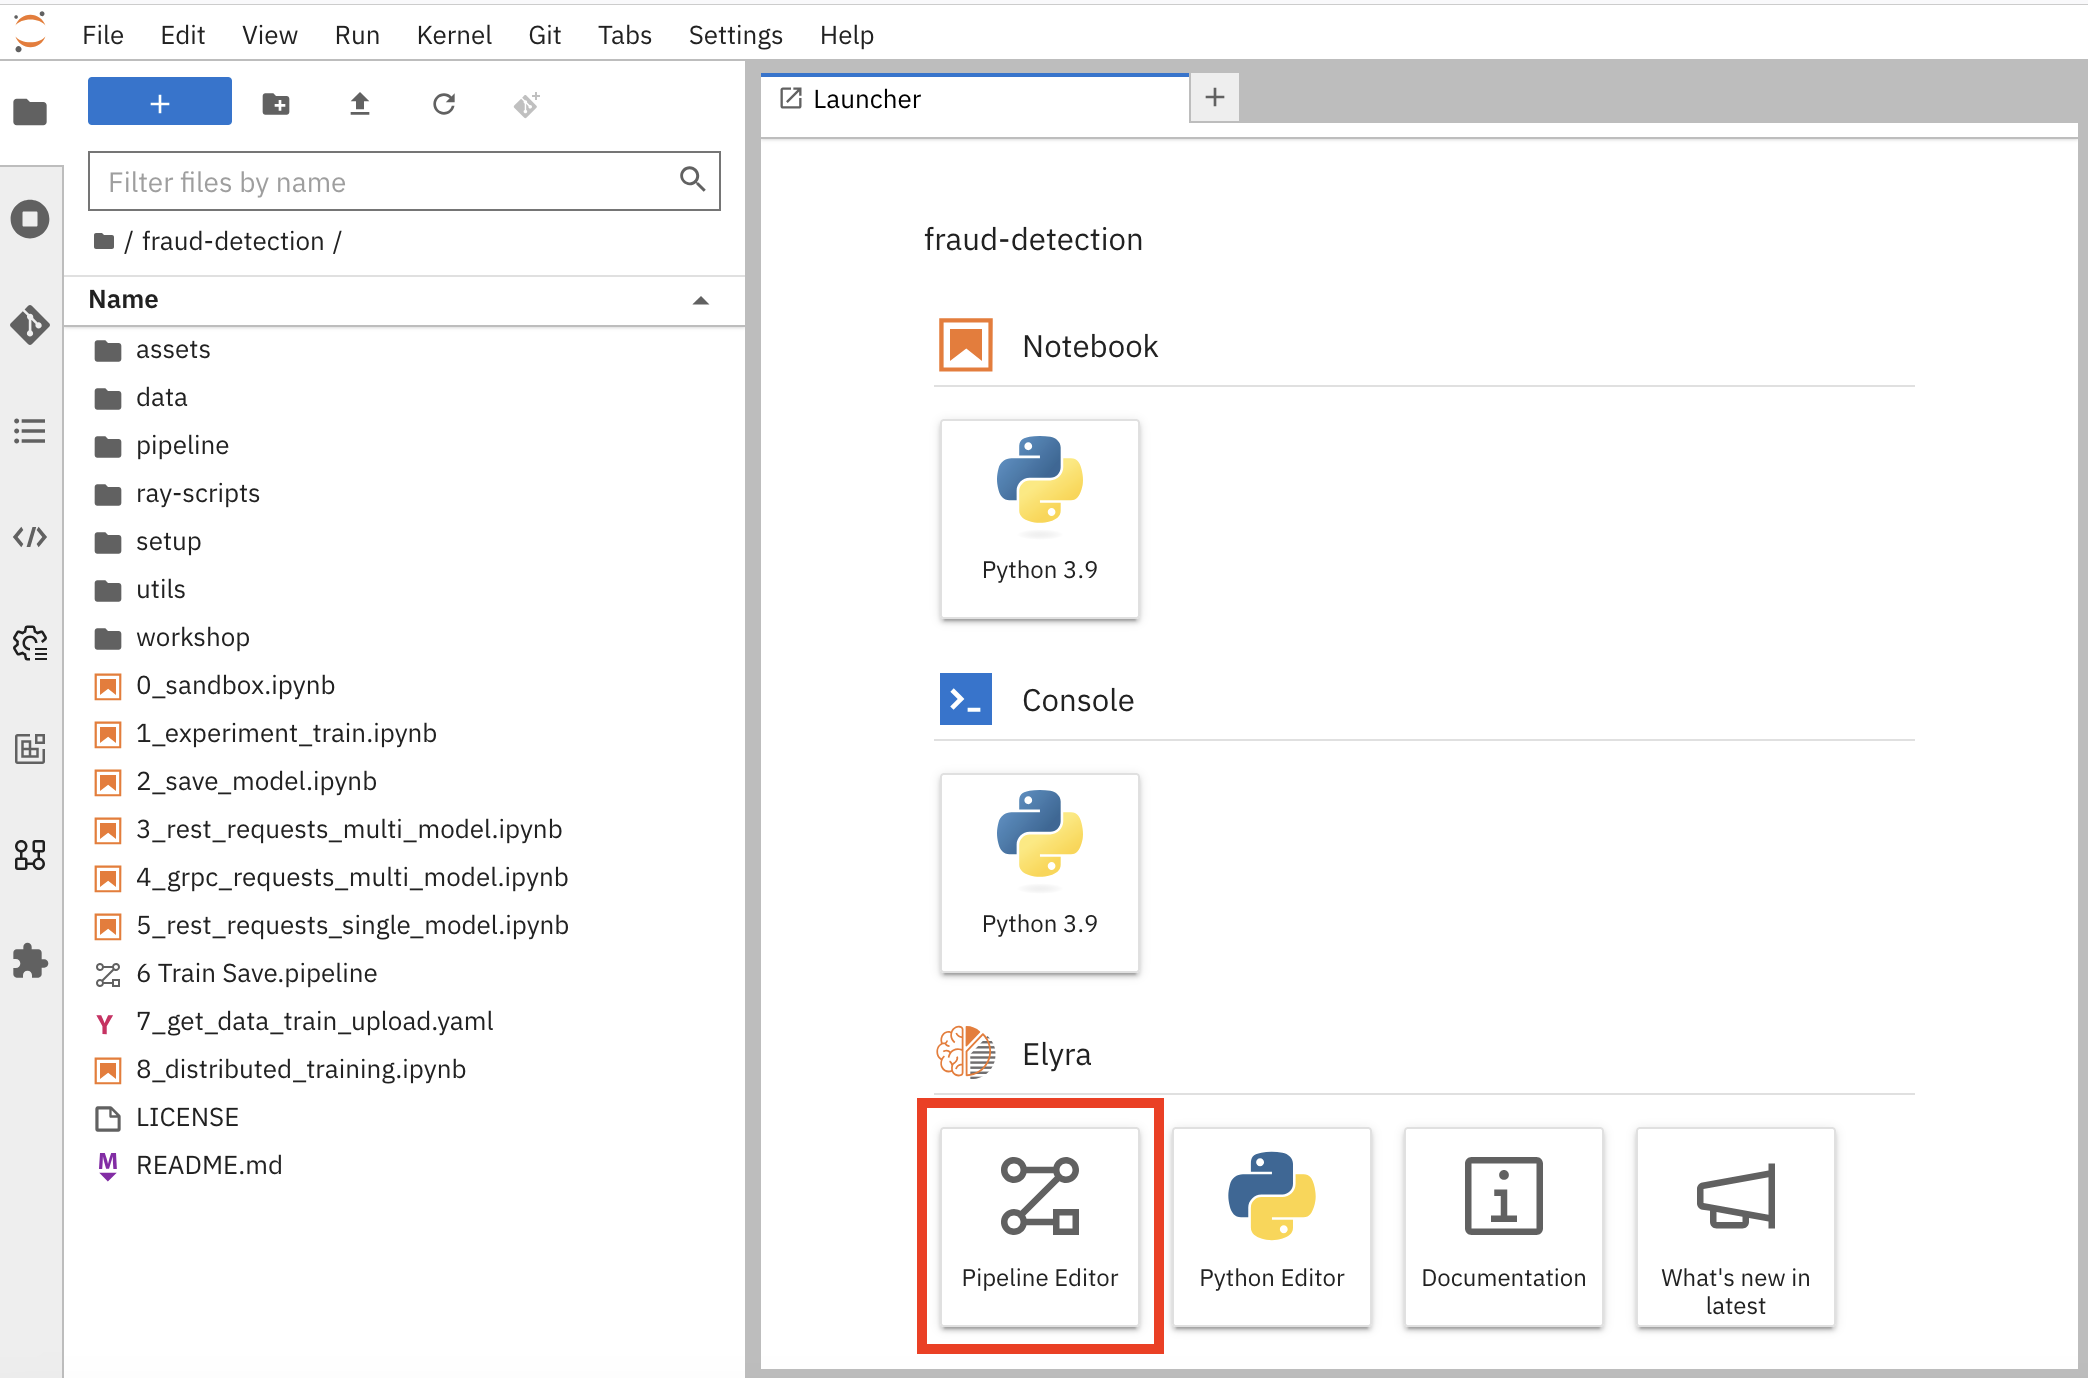
Open your workbench’s JupyterLab environment. If the launcher is not visible, click + to open it.
-
Click Pipeline Editor.
You have created a blank pipeline.
-
Set the default runtime image for when you run your notebook or Python code.
-
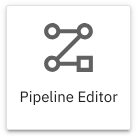
In the pipeline editor, click Open Panel.
-
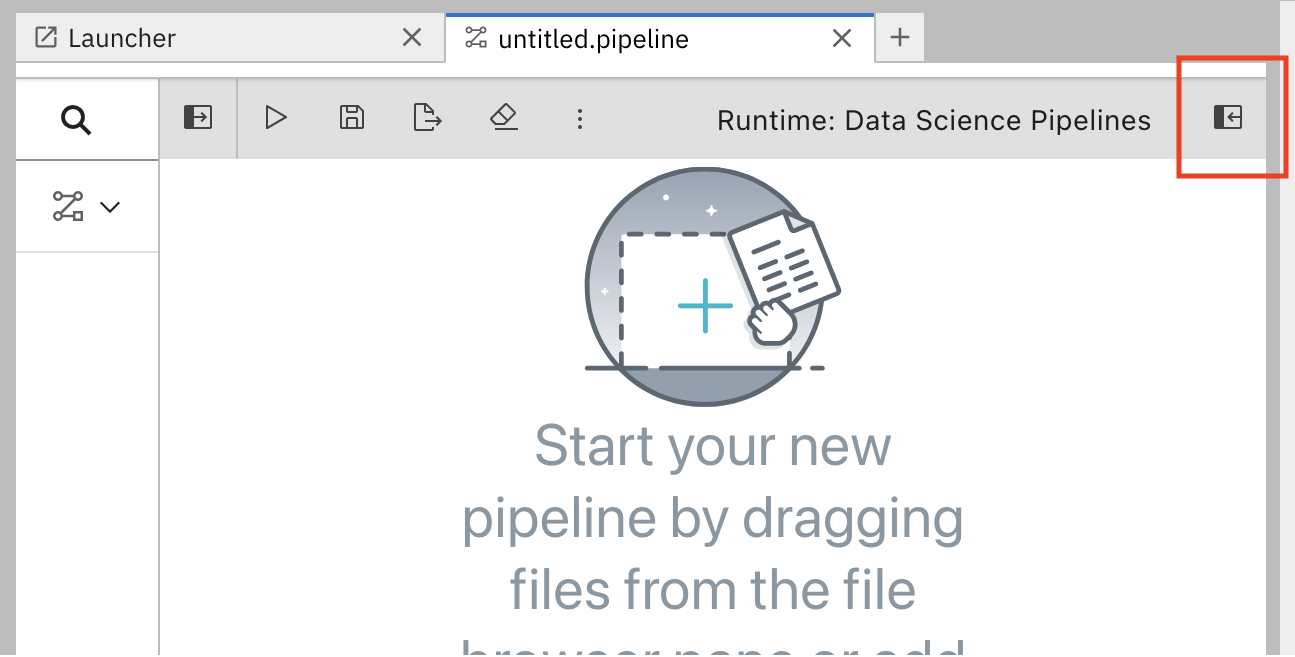
Select the Pipeline Properties tab.
-
In the Pipeline Properties panel, scroll down to Generic Node Defaults and Runtime Image. Set the value to
Runtime | Tensorflow | Cuda | Python 3.12.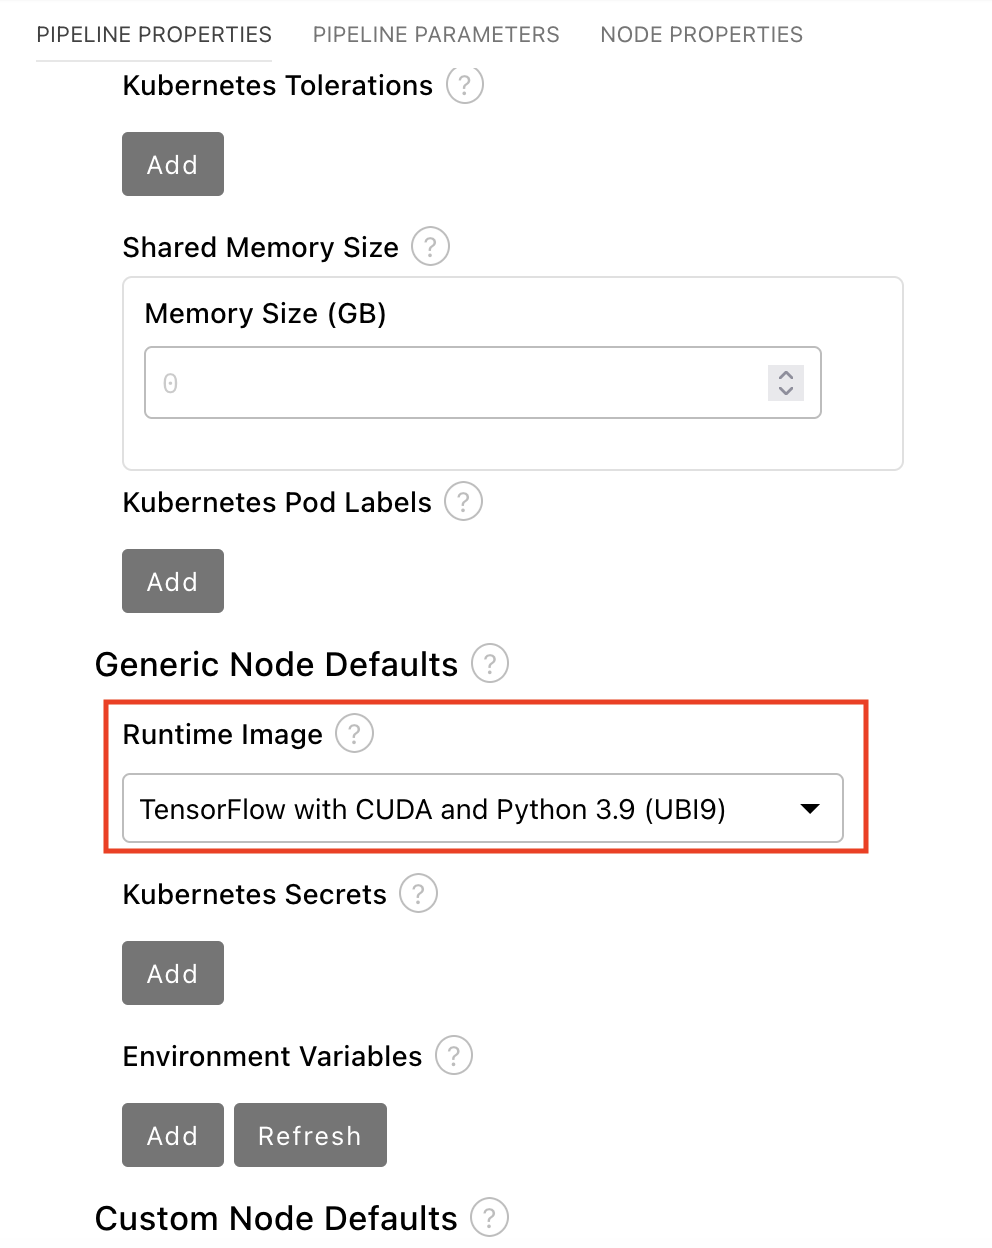
-
-
Select File → Save Pipeline.
-
In the JupyterLab file browser, the pipeline file (for example,
untitled.pipeline) appears in your working directory.